이전글 "[React] Mobx-state-tree 학습하기 #5 : React에서 mobx-state-tree 모델 렌더링하기" 에서 이어지는 내용입니다. 참고로 이 포스팅은 제가 학습한 내용을 노트에 정리하듯이 기록하여 올리는 글이기 때문에 보팅 안해주셔서 됩니다. 많은 분들이 코딩에 흥미를 느꼈으면 좋겠습니다. ㅋ
observer 래퍼를 사용하여, React 컴포넌트가 자동으로 업데이트되는 과정을 배웁니다.
컴포넌트(component)에서 모델 액션(model actions)을 호출하는 방법을 배웁니다.
clone를 사용하여 모델 인스턴스(model instance)를 완전하게 복제하는 방법을 배웁니다.applySnapshot은 스냅샷에 제공된 모델 인스턴스의 상태(the state of a model instance)를 업데이트하는 데 사용합니다.
먼저 WishListItemEdit.js 파일을 생성합니다. 정보를 수정할 수 있는 컴포넌트입니다.
src/components/WishListItemEdit.js
1
2
3
4
5
6
7
8
9
10
11
12
13
14
15
16
17
18
19
20
21
22
23
24
25
26
27
28
29
30
31
32
33
import React, { Component } from 'react' ;import { observer } from 'mobx-react' ;class WishListItemEdit extends Component { render () { const { item } = this .props; return ( <div classname ="item-edit" > Thing: <input value ={item.name} onChange ={this.onNameChange} /> <br /> Price: <input value ={item.price} onChange ={this.onPriceChange} /> <br /> Image: <input value ={item.image} onChange ={this.onImageChange} /> <br /> </div > ) } onNameChange = event => this .props.item.changeName(event.target.value); } onPriceChange = event => const price = parseInt (event.target.value); if (!isNaN (price)) this .props.item.changePrice(price); } onImageChange = event => this .props.item.changeImage(event.target.value); } } export default observer(WishListItemEdit);
그다음 WishListItemView.js 파일을 수정합니다. 그리고 방금 만든 WishListItemEdit 컴포넌트를 사용합니다.
src/components/WishListItemView.js
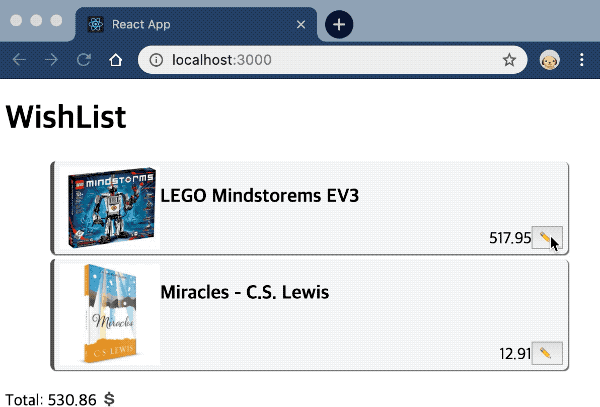
1
2
3
4
5
6
7
8
9
10
11
12
13
14
15
16
17
18
19
20
21
22
23
24
25
26
27
28
29
30
31
32
33
34
35
36
37
38
39
40
41
42
import React, { Component } from "react" ;import { observer } from "mobx-react" ;import WishListItemEdit from "./WishListItemEdit" ;class WishListItemView extends Component { constructor () { super () ; this .state = { isEditing: false }; } render() { const { item } = this .props; return this .state.isEditing ? ( this .renderEditable() ) : ( <li className ="item" > {item.image && <img src ={item.image} alt ="" /> } <h3 > {item.name}</h3 > <span > {item.price}</span > <span > <button onClick ={this.onTooleEdit} > ✏️</button > </span > </li > ); } renderEditable = () => { return ( <li className ="item" > <WishListItemEdit item ={this.props.item} /> </li > ); }; onTooleEdit = () => { this .setState({ isEditing: true }); }; } export default observer(WishListItemView);
WishListItemEdit 컴포넌트로 전환됩니다.
그다음 취소 ❎버튼을 추가합니다.
1
2
3
4
5
6
7
8
9
10
renderEditable = () => { return ( <li className ="item" > <WishListItemEdit item ={this.props.item} /> <span > <button onClick ={this.onCancelEdit} > ❎</button > </span > </li > ); };
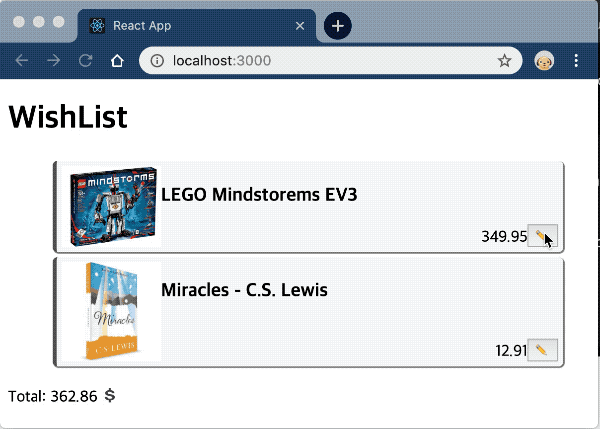
문제점 이 있습니다. 취소 ❎버튼을 눌렀는데 데이터가 변경됩니다.
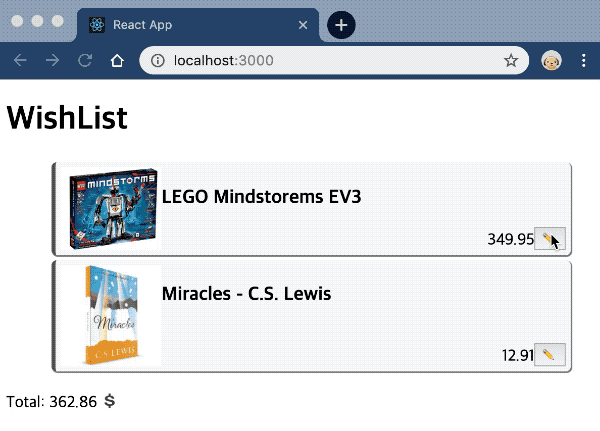
이제 mobx-state-tree 의 clone을 사용하여 원본 데이터가 변경되지 않도록 해봅시다. onTooleEdit 함수에서 this.props.item를 복제(clone)합니다. 그리고 WishListItemEdit 컴포넌트에는 복제한 아이템 this.state.clone 를 넘겨줍니다.
1
2
3
4
5
6
7
8
9
10
11
12
13
14
15
16
17
18
19
20
21
22
23
24
25
26
27
import { clone } from 'mobx -state-tree'; class WishListItemView extends Component { renderEditable = () => { return ( <li className="item" > <WishListItemEdit item={this .state.clone} /> <span> <button onClick={this .onCancelEdit}>❎</button> </span> </li> ); }; onTooleEdit = () => { this .setState({ isEditing: true , clone: clone(this .props.item) }); }; }
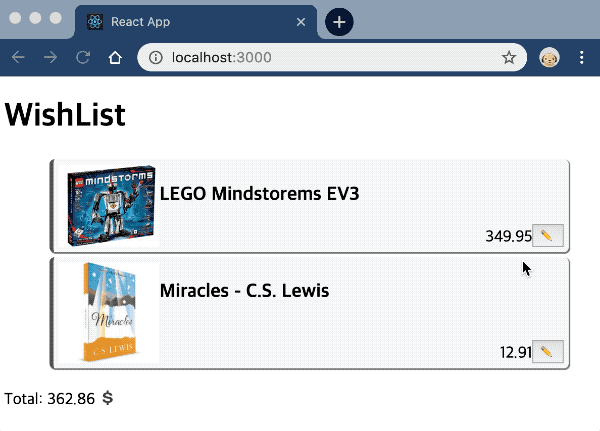
마지막입니다. 이제 변경된 clone 데이터를 mobx-state-tree Models에 적용해야합니다. 여기에는 mobx-state-tree 의 getSnapshot, applySnapshot를 사용합니다.
renderEditable에 저장 💾 버튼을 추가합니다. 그리고 onSaveEdit 함수를 추가합니다. onSaveEdit에서는 clone 스냅샷을 만들고(getSnapshot), 그 스넵샷을 모델에 적용(applySnapshot)합니다.
1
2
3
4
5
6
7
8
9
10
11
12
13
14
15
16
17
18
19
20
21
22
23
24
25
26
import { clone, getSnapshot, applySnapshot } from "mobx-state-tree" ; class WishListItemView extends Component { // ... renderEditable = () => { return ( <li className ="item" > <WishListItemEdit item ={this.state.clone} /> <span > <button onClick ={this.onSaveEdit} > 💾</button > <button onClick ={this.onCancelEdit} > ❎</button > </span > </li > ); }; onSaveEdit = () => { const snapshot = getSnapshot(this .state.clone); applySnapshot(this .props.item, snapshot); this .setState({ isEditing: false , clone : null }); }; }
앱을 실행하고 취소 ❎, 저장 💾버튼을 눌러보면 잘 작동하는 것을 확인할 수 있습니다.