![]()
리액트 네이티브(React Native)로 인스타그램 UI를 구현하는 네 번째 강의입니다. 이번에는 프로필 화면을 구현합니다. 이 포스팅은 아래 무료 동영상 강의를 참고하여 작성되었습니다.
https://youtu.be/9g_73wEbX8E
상단바 수정하기
탭 화면마다 상단바가 다르기 때문에 수정해야합니다. 현재는 모든 탭 화면에서 같은 상단바가 보입니다.
먼저 MainScreen.js 파일을 수정합니다. 아래와 같이 header에 null 을 입력합니다.
1
2
3
4
5
6
7
| export default class MainScreen extends Component {
static navigationOptions = {
header: null
}
|
그다음 ./Components/AppTabNavigator/HomeTab.js 파일을 수정합니다. Header, Left, Right, Body를 추가로 import 합니다.
1
| import { Container, Content, Icon, Thumbnail, Header, Left, Right, Body } from 'native-base';
|
그리고 render() 함수를 수정합니다. Container 아래에 Header를 추가합니다.
1
2
3
4
5
6
7
8
9
10
11
| export default class HomeTab extends Component {
render() {
return (
<Container style={style.container}>
<Header>
<Left><Icon name='ios-camera' style={{ paddingLeft:10 }}/></Left>
<Body><Text>Instagram</Text></Body>
<Right><Icon name='ios-send' style={{ paddingRight:10 }}/></Right>
</Header>
{}
|
여기까지 작업하고 확인해보겠습니다. 확인해보면 HomeTab 에만 헤더가 있고, 나머지 탭 화면는 헤더가 없습니다.
![]()
프로필 페이지 헤더 만들기
./Components/AppTabNavigator/ProfileTab.js를 수정합니다. Image와 Container, Content, Header, Left, Body, Right, Button를 추가로 import 합니다.
1
2
| import { View, Text, StyleSheet, Image } from 'react-native';
import { Icon, Container, Content, Header, Left, Body, Right, Button, Image } from 'native-base';
|
그다음 render() 함수를 수정합니다. 다음과 같이 Header 를 추가합니다.
1
2
3
4
5
6
7
8
9
10
11
12
13
14
15
| export default class ProfileTab extends Component{
render() {
return (
<Container style={{ flex:1, backgroundColor: 'white'}}>
<Header>
<Left><Icon name="md-person-add" style={{ paddingLeft:10 }} /></Left>
<Body><Text>anpigon</Text></Body>
<Right><EntypoIcon name="back-in-time" style={{ paddingRight:10, fontSize: 32 }} /></Right>
</Header>
</Container>
);
}
{/* ... 일부 코드 생략 ... */}
|
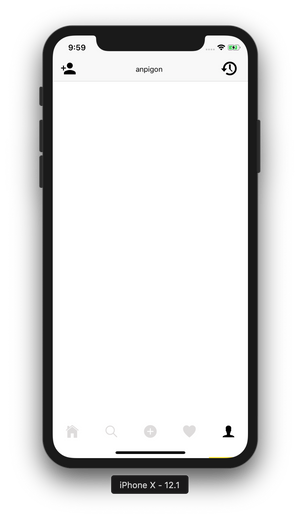
여기까지 작업한 화면입니다. 상단 좌우에 아이콘이 생겼습니다.
![]()
Header 바로 아래에 다음 코드를 입력합니다. 프로필 이미지, 포스팅 수, 팔로워 수, 팔로잉 수를 출력합니다. 바로 아래에 프로필 수정 버튼과 설정 버튼이 위치하고 있습니다. 그리고 그 아래에 이름과 프로필 정보가 출력됩니다.
1
2
3
4
5
6
7
8
9
10
11
12
13
14
15
16
17
18
19
20
21
22
23
24
25
26
27
28
29
30
31
32
33
34
35
36
37
38
39
| <Content>
<View style={{flexDirection:'row', paddingTop:10}}>
<View style={{flex:1, alignItems:'center'}}>
<Image source={{ url: 'https://steemitimages.com/u/anpigon/avatar' }}
style={{width:75, height:75, borderRadius:37.5}}/>
</View>
<View style={{flex:3}}>
<View style={{flexDirection:'row', justifyContent:'space-around'}}>
<View style={{alignItems:'center'}}>
<Text>167</Text>
<Text style={{fontSize:10, color:'gray'}}>posts</Text>
</View>
<View style={{alignItems:'center'}}>
<Text>346</Text>
<Text style={{fontSize:10, color:'gray'}}>follower</Text>
</View>
<View style={{alignItems:'center'}}>
<Text>192</Text>
<Text style={{fontSize:10, color:'gray'}}>following</Text>
</View>
</View>
<View style={{flexDirection:'row'}}>
<Button bordered dark
style={{flex:4, marginLeft:10, justifyContent:'center', height:30, marginTop:10}}>
<Text>Edit Profile</Text>
</Button>
<Button bordered dark small icon
style={{flex:1, marginRight:10, marginLeft:5, justifyContent:'center', height:30, marginTop:10}}>
<Icon name="settings" />
</Button>
</View>
</View>
</View>
<View style={{paddingHorizontal:10, paddingVertical:10}}>
<Text style={{fontWeight:'bold'}}>안피곤</Text>
<Text>Lark | Computer Jock | Commercial Pilot</Text>
<Text>www.steemit.com/@anpigon</Text>
</View>
</Content>
|
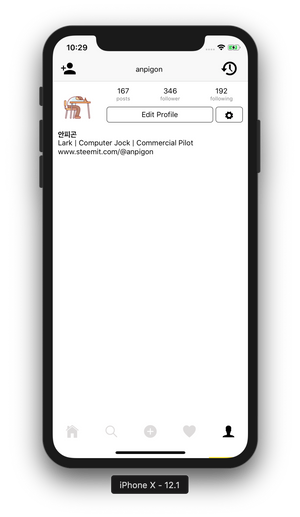
여기까지 작업한 화면입니다.
![]()
스팀잇 프로필 정보 출력하기
스팀잇 서버에서 계정 정보를 가져오는 함수를 입력합니다. 스팀잇의 database_api.get_accounts API를 사용합니다.
1
2
3
4
5
6
7
8
9
10
11
12
13
14
15
16
17
18
| fetchAccount(username) {
const data = {
id: 3,
jsonrpc: "2.0",
method: "call",
params: [
"database_api",
"get_accounts",
[[username]]
]
};
return fetch('https://api.steemit.com', {
method: 'POST',
body: JSON.stringify(data)
})
.then(res => res.json())
.then(res => res.result[0])
}
|
그리고 스팀잇 팔로우 수와 팔로잉 수를 가져오는 함수를 입력합니다. follow_api.get_follow_count API를 사용합니다.
1
2
3
4
5
6
7
8
9
10
11
12
13
14
15
16
17
18
| fetchFollowCount(username) {
const data = {
id: 4,
jsonrpc: "2.0",
method: "call",
params: [
"follow_api",
"get_follow_count",
[username]
]
};
return fetch('https://api.steemit.com', {
method: 'POST',
body: JSON.stringify(data)
})
.then(res => res.json())
.then(res => res.result)
}
|
그다음 componentWillMount() 를 구현합니다. 그리고 방금 구현한 함수를 호출합니다. 계정 정보와 팔로우 수를 가져와서 state 에 저장합니다. 명성(reputation)도 계산하여 저장하고 있습니다.
1
2
3
4
5
6
7
8
9
10
11
12
13
14
15
16
17
18
19
20
21
| componentWillMount() {
const username = 'anpigon';
this.fetchAccount(username).then(({name, post_count, reputation, json_metadata}) => {
const { profile } = JSON.parse(json_metadata);
const log = Math.log(parseInt(reputation.substring(0, 4))) / Math.log(10);
this.setState({
name,
reputation: Math.max(reputation.length - 1 + log - parseInt(log) - 9, 0) * 9 + 25,
postCount: post_count,
profile
})
});
this.fetchFollowCount(username).then(({following_count, follower_count}) => {
this.setState({
followingCount: following_count,
followerCount: follower_count
})
});
}
|
마지막으로 render() 함수를 수정합니다. 앞에서 가져온 정보들을 출력하기 위해 데이터를 맵핑합니다.
1
2
3
4
5
6
7
8
9
10
11
12
13
14
15
16
17
18
19
20
21
22
23
24
25
26
27
28
29
30
31
32
33
34
35
36
37
38
39
40
41
42
43
44
45
46
47
48
49
50
51
52
53
54
55
56
57
58
59
| render() {
const {
name,
reputation,
profile,
postCount,
followingCount,
followerCount
} = this.state;
return (
<Container style={{ flex:1, backgroundColor: 'white'}}>
<Header>
<Left><Icon name="md-person-add" style={{ paddingLeft:10 }} /></Left>
<Body><Text>{name}</Text></Body>
<Right><EntypoIcon name="back-in-time" style={{ paddingRight:10, fontSize: 32 }} /></Right>
</Header>
<Content>
<View style={{flexDirection:'row', paddingTop:10}}>
<View style={{flex:1, alignItems:'center'}}>
<Image source={{ url: profile.profile_image }}
style={{width:75, height:75, borderRadius:37.5}}/>
</View>
<View style={{flex:3}}>
<View style={{flexDirection:'row', justifyContent:'space-around'}}>
<View style={{alignItems:'center'}}>
<Text>{postCount}</Text>
<Text style={{fontSize:10, color:'gray'}}>posts</Text>
</View>
<View style={{alignItems:'center'}}>
<Text>{followingCount}</Text>
<Text style={{fontSize:10, color:'gray'}}>follower</Text>
</View>
<View style={{alignItems:'center'}}>
<Text>{followerCount}</Text>
<Text style={{fontSize:10, color:'gray'}}>following</Text>
</View>
</View>
<View style={{flexDirection:'row'}}>
<Button bordered dark
style={{flex:4, marginLeft:10, justifyContent:'center', height:30, marginTop:10}}>
<Text>Edit Profile</Text>
</Button>
<Button bordered dark small icon
style={{flex:1, marginRight:10, marginLeft:5, justifyContent:'center', height:30, marginTop:10}}>
<Icon name="settings" />
</Button>
</View>
</View>
</View>
<View style={{paddingHorizontal:10, paddingVertical:10}}>
<Text style={{fontWeight:'bold'}}>{profile.name} ({reputation.toFixed(2)})</Text>
<Text>{profile.about}</Text>
<Text>{profile.website}</Text>
</View>
</Content>
</Container>
);
}
|
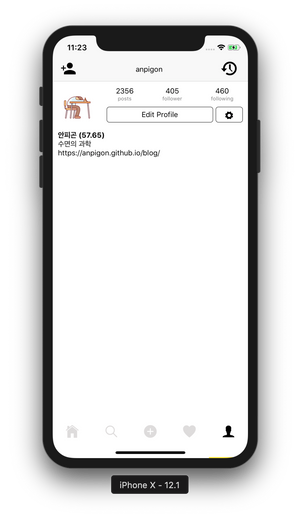
오늘 작업한 결과 화면입니다.
![]()
작업한 코드는 모두 깃허브에 업로드되어 있습니다.
https://github.com/anpigon/rn_instagram_clone
여기까지 읽어주셔서 감사합니다.
시리즈