이번에는 생성한 지갑키를 Storage 에 저장합니다. 우리는 React Native 의 Secure Storage 를 사용하여 지갑키를 저장 할 것입니다. Secure Storage 는 iOS/Android의 Keychain/Keystore를 이용하여 데이터를 안전하게 저장합니다. Secure Storage 를 사용하면, 지문인증과 같은 생체인증도 이용할 수 있습니다.
지갑키를 Secure Storage 저장하기 위해서 react-native-secure-key-store 라이브러리를 설치합니다.
1
2
$ npm install react-native-secure-key-store --save $ react-native link react-native-secure-key-store
참고: https://github.com/pradeep1991singh/react-native-secure-key-store
그리고 지갑키 저장에 필요한 라이브러리를 import 합니다.
1
2
import { StyleSheet, View, AsyncStorage } from 'react-native' ;import RNSecureKeyStore, {ACCESSIBLE} from "react-native-secure-key-store" ;
생성된 지갑키와 지갑 정보를 Storage 에 저장합니다.
1
2
3
4
5
6
7
8
9
10
11
12
13
14
15
16
17
18
19
20
21
22
23
24
25
26
27
28
29
30
31
32
33
34
35
36
37
38
39
40
41
42
43
44
45
46
47
48
49
50
51
52
53
54
55
export default class CreateWalletScreen extends Component { static navigationOptions = { } constructor (props ) { /* (... ) */ } componentWillMount = (... ) */ } _storeData = async (wallet, privateKey ) => { try { // 기존 지갑 목록 정보 가져오기 const wallets = JSON .parse (await AsyncStorage.getItem('WALLETS' ) wallets.push(wallet); await AsyncStorage.setItem('WALLETS' , JSON .stringify(wallets)); await RNSecureKeyStore.set(wallet.address, privateKey, {accessible: ACCESSIBLE.ALWAYS_THIS_DEVICE_ONLY}); } catch (error) { console .log(error); } }; _createWallet = async () => { const seed = bip39.mnemonicToSeed(this .state.mnemonic); const root = bip32.fromSeed(seed); const xPrivKey = root.derivePath("m/44'/60'/0'/0/0" ); const privKey = xPrivKey.privateKey.toString('hex' ); let address = ethUtil.pubToAddress(xPrivKey.publicKey, true ).toString('hex' ); address = ethUtil.toChecksumAddress(address).toString('hex' ); const wallet = { name : '이더리움' , coinType : 'ETH' , symbol : 'ETH' , address } await this ._storeData(wallet, privKey); this .props.navigation.goBack(); } render() { } }
지갑 정보를 저장하는 _storeData() 함수를 생성합니다. 지갑키는 SecureStorage에 저장합니다. 그리고 지갑키를 제외한 정보는 일반 Storage에 저장합니다.
_createWallet() 함수에서는 생성된 지갑키와 지갑 정보를 _storeData() 함수를 사용하여 저장합니다.마지막으로 지갑 정보와 지갑키 저장이 끝나면, 지갑 목록 화면으로 돌아갑니다.
components/WalletComponent.js 파일을 생성합니다. 지갑 목록에서 하나의 지갑을 나타내는 컴포넌트입니다.
./src/components/WalletComponent.js
1
2
3
4
5
6
7
8
9
10
11
12
13
14
15
16
17
18
19
20
21
22
23
24
25
26
27
28
29
30
31
32
33
34
35
import React from 'react' ;import { Card, CardItem, Body, Text, Icon, Button, Left, Right, Thumbnail } from 'native-base' ; export default function WalletComponent (props ) { const wallet = props .wallet ; return ( <Card > <CardItem > <Left > <Thumbnail small source ={{uri: 'https: //s2.coinmarketcap.com /static /img /coins /32x32 /1027.png '}} /> <Body > <Text > ETH</Text > <Text note > {wallet.name}</Text > </Body > </Left > <Right > <Icon name ='dots-vertical' type ='MaterialCommunityIcons' /> </Right > </CardItem > <CardItem > <Text note ellipsizeMode ="middle" numberOfLines ={1} selectable ={true} > {wallet.address}</Text > </CardItem > <CardItem > <Body style ={{ alignItems: 'flex-end ' }}> <Text > {wallet.balance || '0.00'} </Text > <Text note style ={{ marginRight:0 }}> ≈ ₩ {wallet.convertPrice || '0.00'} </Text > </Body > </CardItem > </Card > ); }
WalletsScreen.js 파일을 수정합니다. 우선 react-native 에서 AsyncStorag를 import 합니다. 그리고 NavigationEvents도 import합니다.
1
2
import { StyleSheet, View, AsyncStorage } from 'react-native' ;import { NavigationEvents } from 'react-navigation' ;
그리고 WalletsScreen 를 수정합니다.
1
2
3
4
5
6
7
8
9
10
11
12
13
14
15
16
17
18
19
20
21
22
23
24
25
26
27
28
29
30
31
32
33
34
35
36
37
38
39
40
41
42
43
44
45
export default class WalletsScreen extends Component { static navigationOptions = {} constructor (props ) { super (props ); this .state = { wallets : [] } } _onWillFocus = payload => AsyncStorage.getItem('WALLETS' ).then(wallets => this .setState({ wallets : JSON .parse(wallets) || [], }) }); } render() { return ( <View > <NavigationEvents onWillFocus ={this._onWillFocus} /> <Container style ={styles.container} > <Content padder > { this.state.wallets.map((wallet) => { return ( <WalletComponent wallet ={wallet} /> ) }) } <Card > {/* (...) */} </Card > </Content > </Container > </View > ); } }
지갑을 생성하고 지갑 목록화면으로 돌아오면, 생성된 지갑이 추가되어 보일 것입니다.
Container 컴포넌트 바로 위에 NavigationEvents 컴포넌트가 사용되었습니다. Redux를 사용하지 않고, NavigationEvents를 사용하여 단순하게 처리하였습니다.
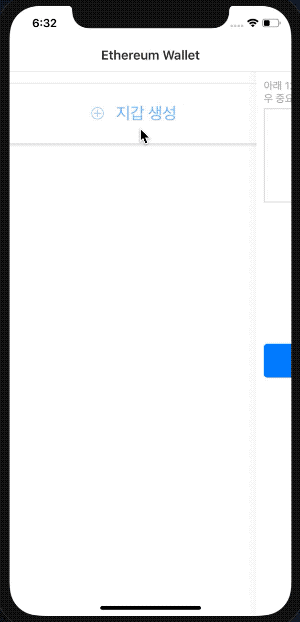
여기까지 작성하고 앱을 실행하고 확인하면 이렇게 보일 것입니다.
여기까지 읽어주셔서 감사합니다.