![]()
리액트 네이티브로 날씨앱 만들기 네번째 강좌
리액트 네이티브를 사용하여 날씨앱을 만드는 네번째 강좌입니다. 이번에는 styles를 이용하여 화면을 이쁘게 디자인합니다.
이전글
날씨 아이콘 사용하기
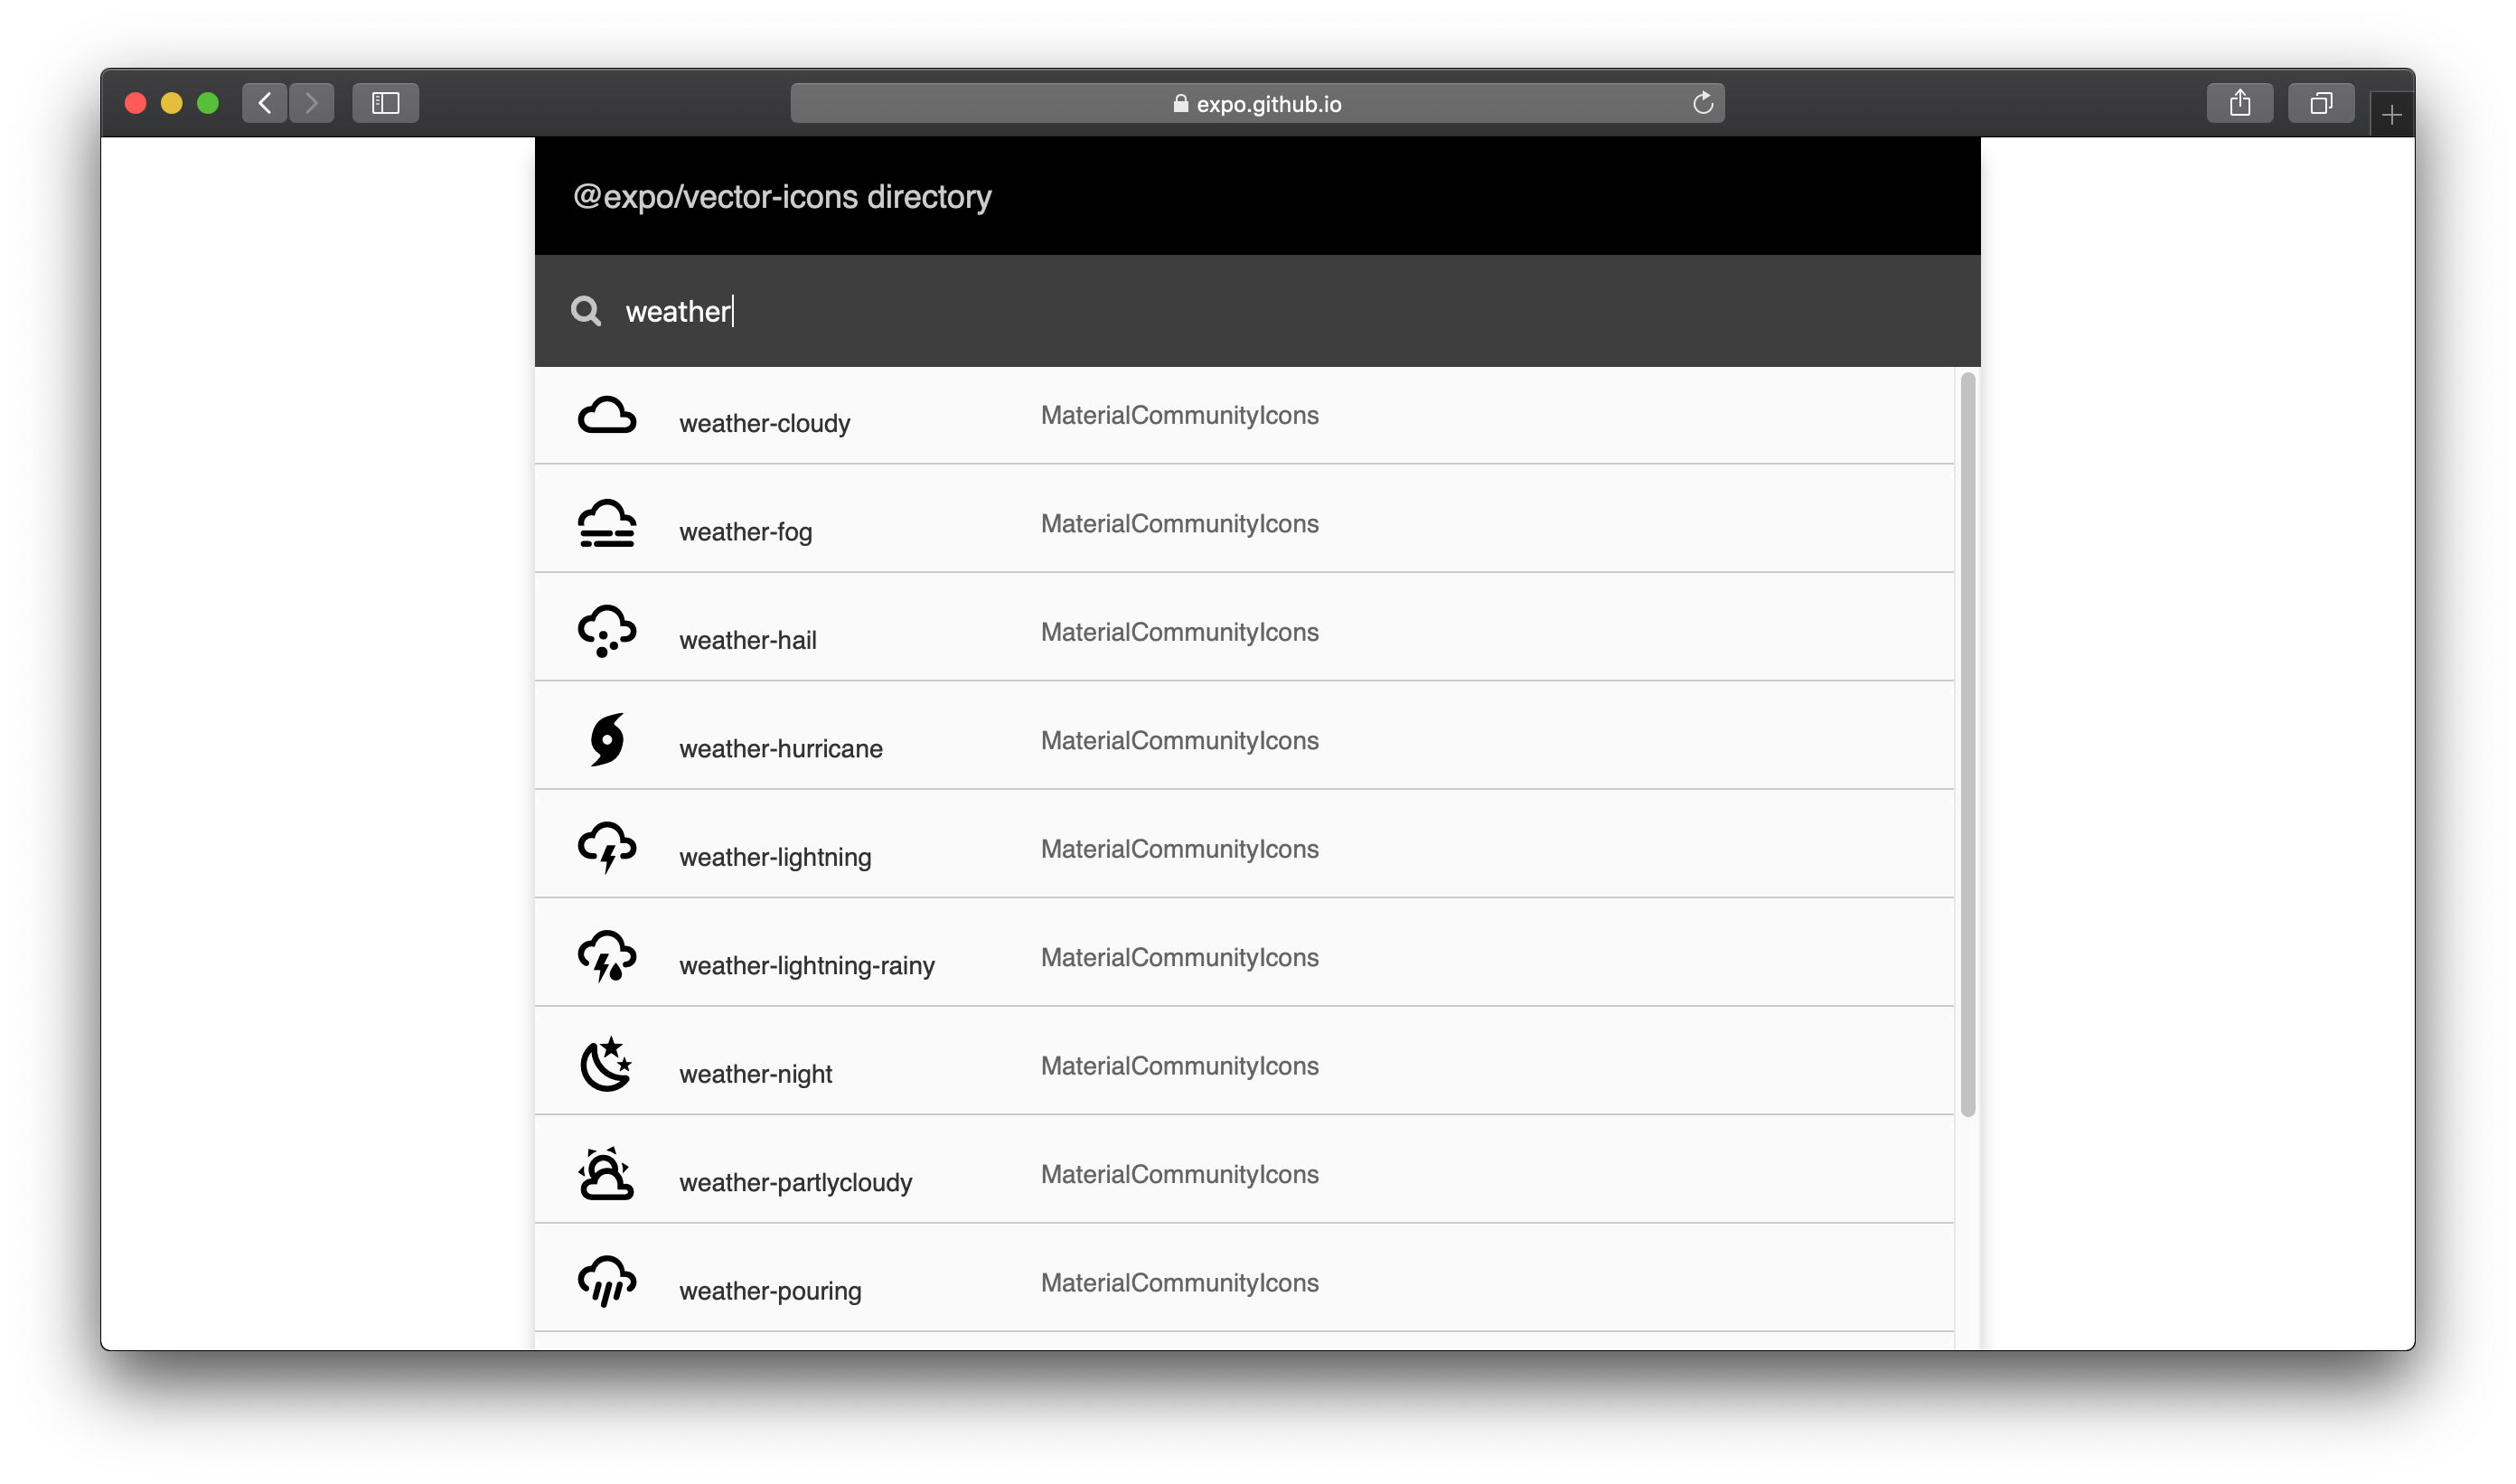
expo 모듈에서 제공하는 아이콘을 사용하여 날씨를 표현해보자. 아이콘 종류는 아래 사이트에서 확인 가능하다.
https://expo.github.io/vector-icons/
![]()
weather라고 검색하면, MaterialCommunityIcons 그룹에 날씨 아이콘이 있는 것을 확인 할 수 있다.
Weather.js 파일을 열어 수정한다.
1
2
3
4
5
6
7
8
9
10
11
| import { MaterialCommunityIcons } from "@expo/vector-icons";
const Weather = ({ data }) => {
return (
<View>
<MaterialCommunityIcons size={150} name='weather-cloudy'/>
<Text>{data.weather[0].main}</Text>
<Text>{Math.ceil(data.main.temp - 273.15)}℃</Text>
</View>
);
}
|
@expo/vector-icons를 import하고, <MaterialCommunityIcons> 아이콘 크기 150을 사용했다.
여기까지 하고 앱을 확인해보자.
![]()
날씨에 해당하는 아이콘 표시하기
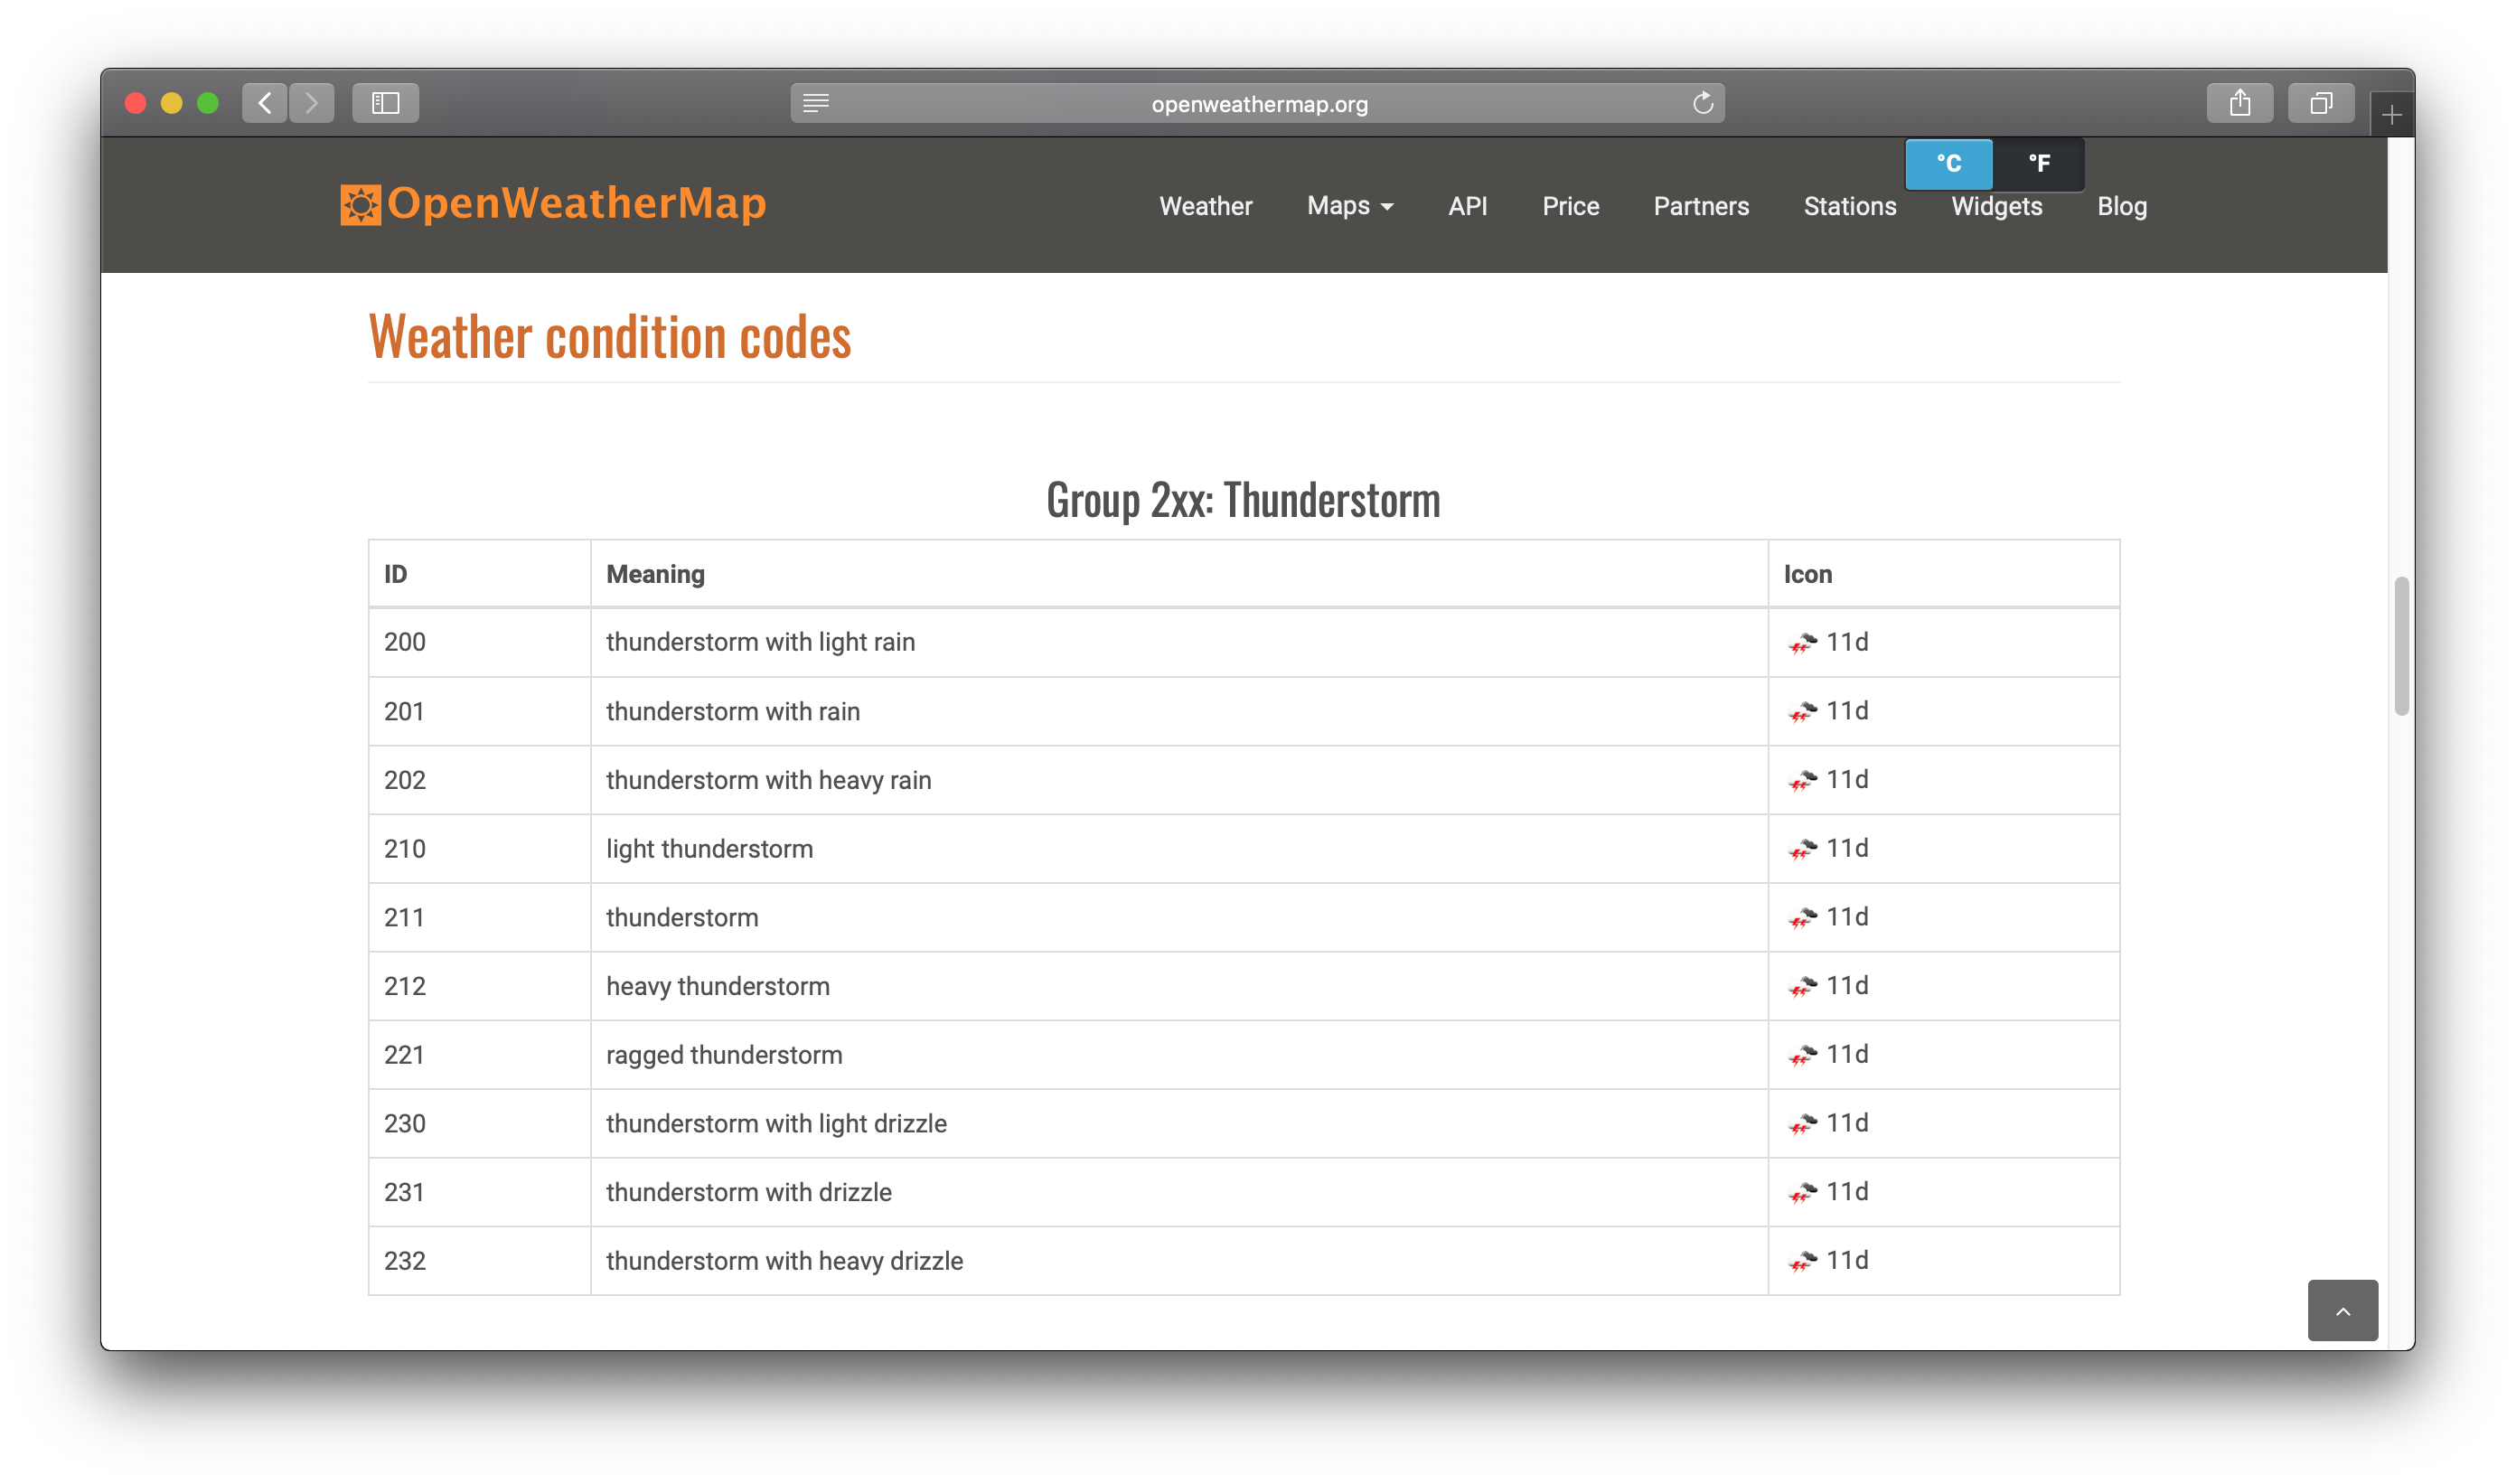
아래 openweathermap 사이트에서 날씨 그룹을 확인해 보자.
https://openweathermap.org/weather-conditions
![]()
ID가 2xx 이면 Thunderstorm 이고, 3xx 이면 Drizzle 이다.
그룹 번호에 맞게 아이콘 데이터를 생성한다. Weather.js 에 아래 코드를 입력한다.
1
2
3
4
5
6
7
8
9
10
11
12
13
14
15
16
17
18
19
20
21
22
23
| const WeatherGroup = {
0: {
icon: 'weather-sunny'
},
2: {
icon: 'weather-lightning'
},
3: {
icon: 'weather-rainy'
},
5: {
icon: 'weather-pouring'
},
6: {
icon: 'weather-snowy'
},
7: {
icon: 'weather-fog'
},
8: {
icon: 'weather-cloudy'
}
}
|
참고로 Clear(sunny) 는 그룹 800이지만, Clouds 와 겹치기 때문에 임의로 0번 그룹으로 지정하였다.
이제 WeatherGroup 데이터에서 그룹 번호에 맞는 정보를 가져오자.
1
2
3
4
5
6
7
8
9
10
11
| const Weather = ({ data }) => {
const id = data.weather[0].id;
const weather = id === 800 ? WeatherGroup[0] : WeatherGroup[parseInt(id / 100)];
return (
<View>
<MaterialCommunityIcons size={150} name={weather.icon}/>
<Text>{data.weather[0].main}</Text>
<Text>{Math.ceil(data.main.temp - 273.15)}℃</Text>
</View>
);
}
|
Clear 와 Clouds 가 같은 그룹 8xx 라서 조건문을 넣었다.
스타일 지정하기
Weather.js 파일 하단에 아래와 같이 작성한다.
1
2
3
4
5
6
7
8
9
10
11
12
13
14
15
16
17
18
19
20
| const styles = StyleSheet.create({
top: {
flex: 1,
alignItems: 'center',
justifyContent: 'flex-end'
},
bottom: {
flex: 1,
alignItems: 'center',
justifyContent: 'flex-start'
},
main: {
fontSize: 50,
marginBottom:10,
fontWeight: '600'
},
temp: {
fontSize: 30
}
});
|
StyleSheet은 기본적으로 CSS 개념과 비슷하다. flex 속성을 사용하여 상단, 하단을 50:50으로 나눴다. 그리고 각각의 텍스트 크기도 키웠다. flex은 flexbox의 기본 개념을 참고한다.
생성한 styles을 JSX에 적용한다.
1
2
3
4
5
6
7
8
9
10
11
12
13
14
15
| const Weather = ({ data }) => {
const id = data.weather[0].id;
const weather = id === 800 ? WeatherGroup[0] : WeatherGroup[parseInt(id / 100)];
return (
<View>
<View style={styles.top}>
<MaterialCommunityIcons size={150} name={weather.icon}/>
</View>
<View style={styles.bottom}>
<Text style={styles.main}>{data.weather[0].main}</Text>
<Text style={styles.temp}>{Math.ceil(data.main.temp - 273.15)}℃</Text>
</View>
</View>
);
}
|
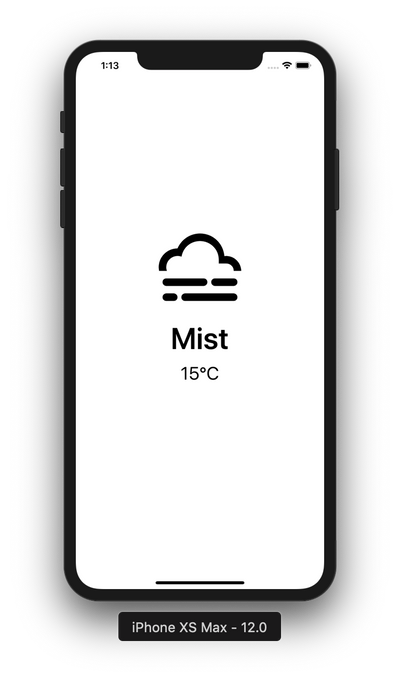
여기까지 하고 앱을 확인해보자.
![]()
배경색 바꾸기
날씨앱 배경으로 그라데이션을 사용해보자. 좀 더 예쁘게 보일수 있다.
1
2
3
4
5
6
7
8
9
10
11
12
13
| import { StyleSheet, Text, View, Dimensions } from 'react-native';
import { LinearGradient } from 'expo';
const { width, height } = Dimensions.get('window');
const styles = StyleSheet.create({
container: {
flex: 1,
width,
height
},
}
|
LinearGradient를 사용하기 위해 expo를 import했다. 그리고 react-native의 Dimensions을 사용하여 window의 width와 height를 가져왔다. 마지막으로 styles에 container를 추가했다.
view는 아래와 같이 LinearGradient로 감싼다. 그리고 그라데이션 색상과 스타일을 지정한다.
1
2
3
4
5
6
7
8
9
| <LinearGradient colors={['#108dc7', '#ef8e38']} style={styles.container}>
<View style={styles.top}>
<MaterialCommunityIcons size={150} color='white' name={weather.icon}/>
</View>
<View style={styles.bottom}>
<Text style={styles.main}>{data.weather[0].main}</Text>
<Text style={styles.temp}>{Math.ceil(data.main.temp - 273.15)}℃</Text>
</View>
</LinearGradient>
|
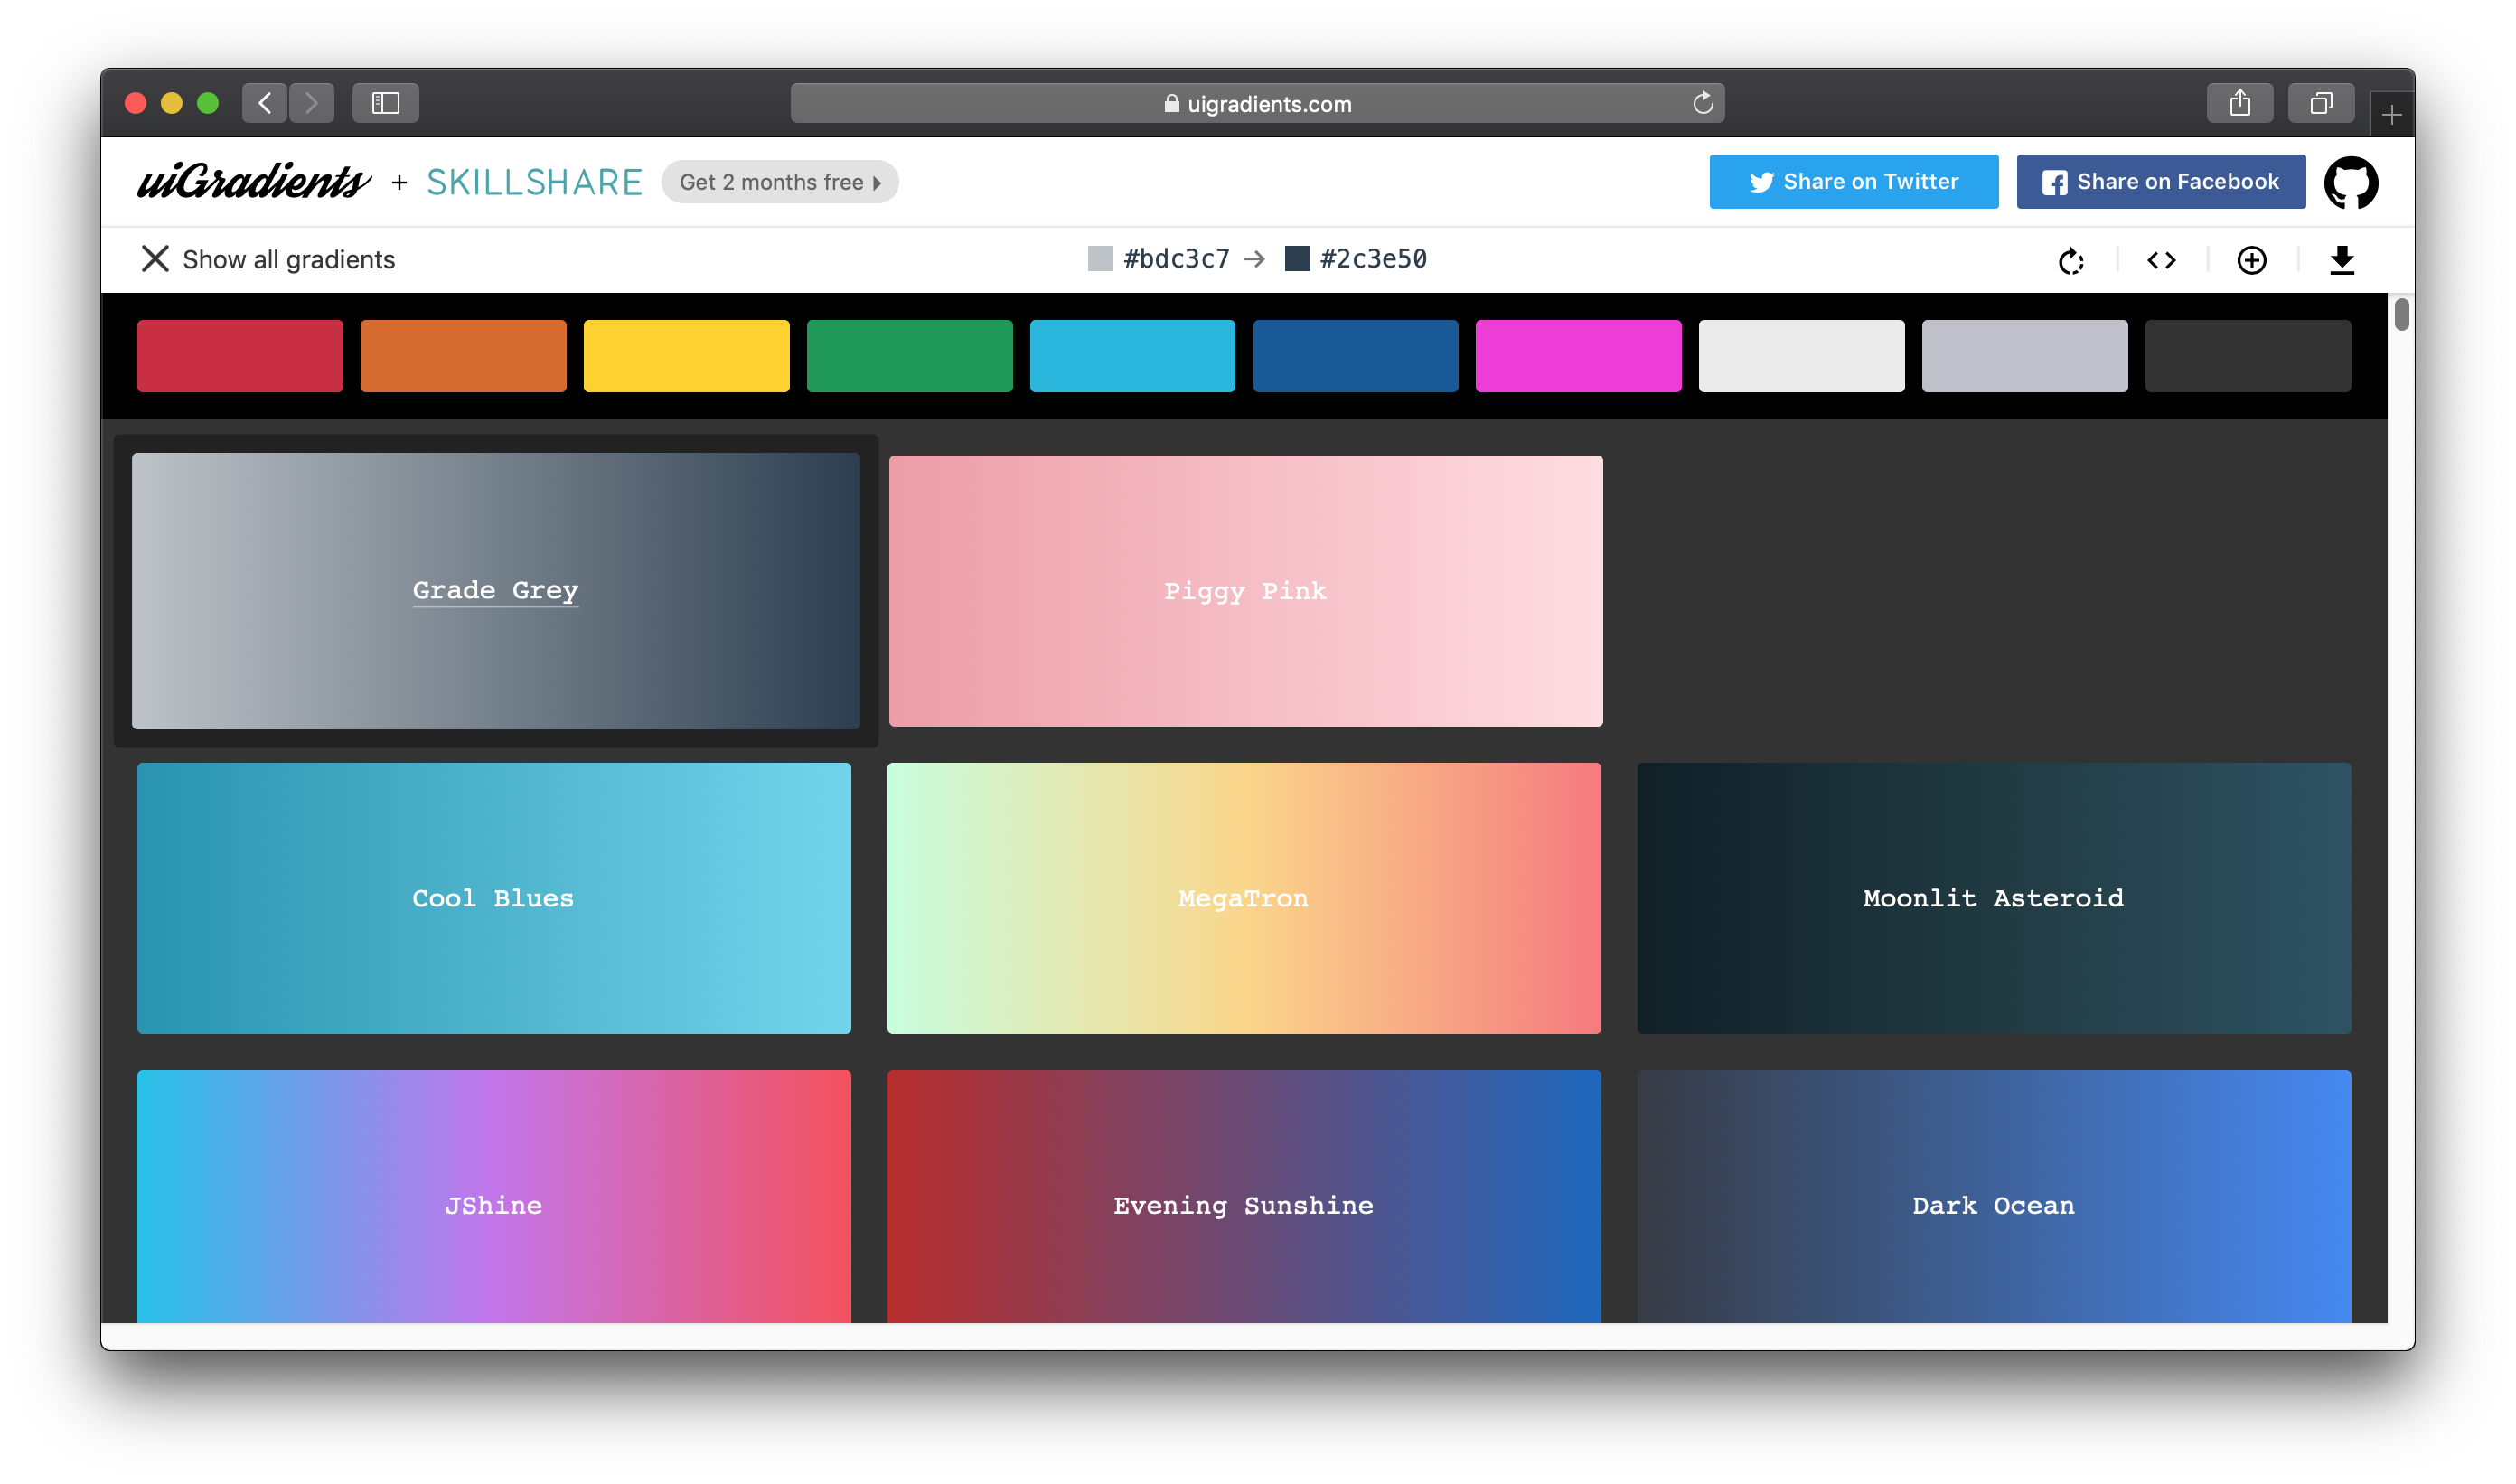
그라데이션 색상은 아래 사이트에서 찾아볼수 있다.
https://uigradients.com/#GradeGrey
![]()
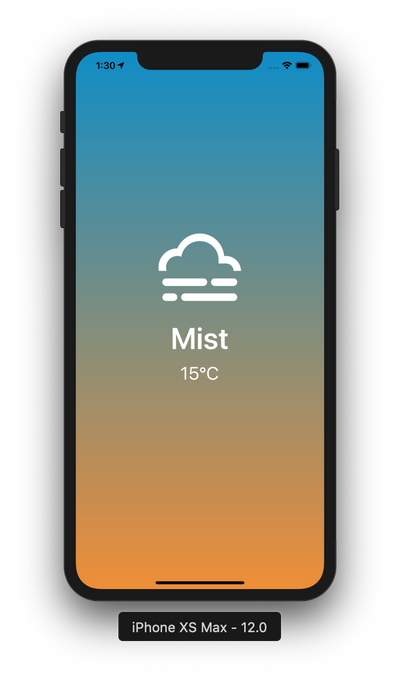
여기까지 하고 앱을 확인해보자.
![]()
날씨 앱을 완성하였습니다.
여기에 작성하지는 않았지만, 조금 더 수정하여 날씨마다 배경색에 변화를 주었습니다.
그리고 모든 소스는 깃허브에서 확인할 수 있습니다.
https://github.com/anpigon/weather_app
여기까지 읽어주셔서 감사합니다.